ad
- Overview
- Selecting an Output Device
- Setting a Default Sound Device
- Enable or Disable Audio Devices (Audio Permissions)
- Output Format
- Spatial Sound
- Audio Enhancements (Device Default Effects)
- Volume Mixer for Adjusting App-Specific Volume
Overview
This guide provides an overview of sound output settings in Windows 11. In my experience, the settings interface is easier to navigate compared to Windows 10. Knowing these settings can help prevent configuration errors and make audio output from Windows smoother and more convenient. Note that this guide does not cover severe driver issues or troubleshooting.
Did you find this article helpful? Let us know if you need any other information.
@AtsushiCafeK
Selecting an Output Device
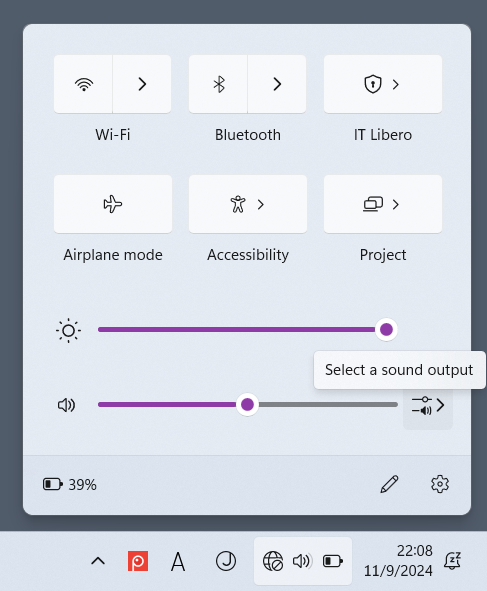
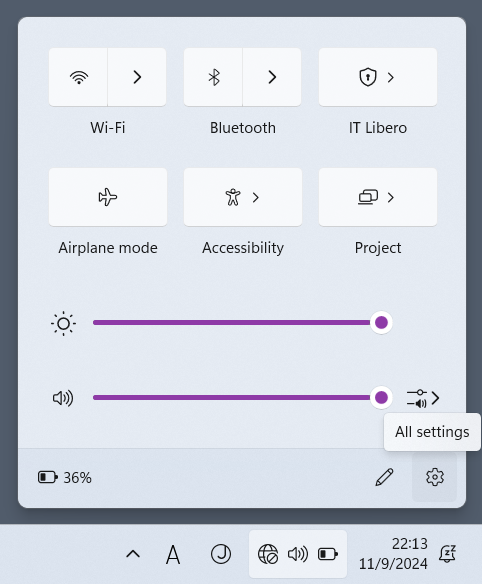
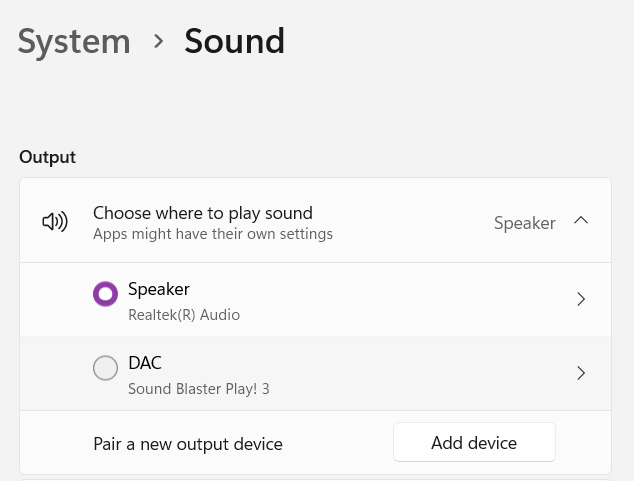
Windows allows you to choose from several audio output devices, such as built-in speakers, headphones, and HDMI-connected displays. You can select connected devices through the following steps. If your device doesn’t appear in the list, check the audio permissions (enabling/disabling audio) as explained later.
Setting a Default Sound Device
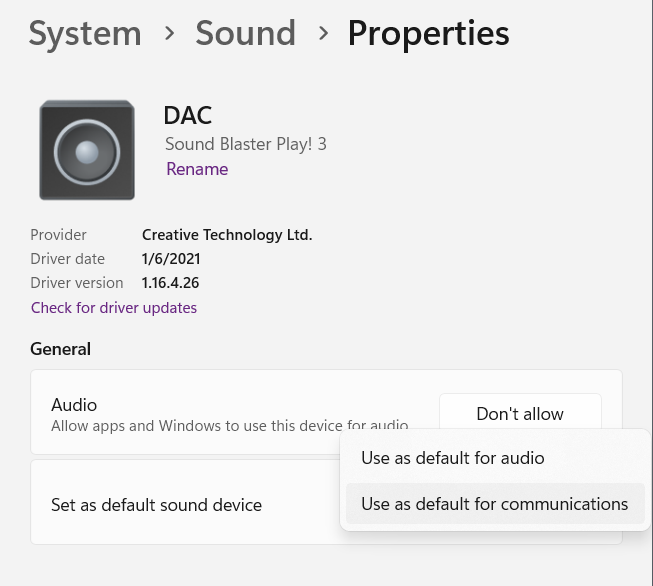
Windows lets you set a default output device, which will be used automatically for audio in web meetings and general audio playback.
Follow these steps to set the default sound device in the Sound menu:
Additional Information
“Default for communications” typically refers to settings for calling apps such as Zoom, Teams, and Skype. However, most communication apps often select the default audio device by default, which can help avoid confusion. I recommend keeping the default settings unified for ease of use. Additionally, some meeting platforms remember the last connected device.
Enable or Disable Audio Devices (Audio Permissions)
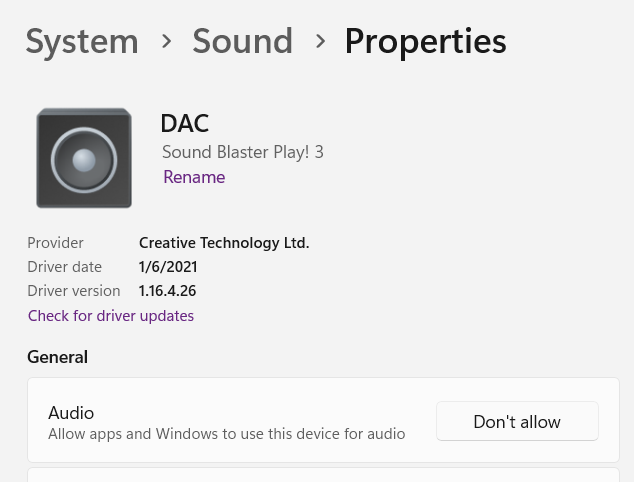
This feature allows you to hide connected or built-in audio devices. Once a device is disabled through this setting, it will no longer appear when selecting output devices or in meeting applications. This can simplify your device list if there are devices you never use. Follow these steps to enable or disable a device:
Output Format
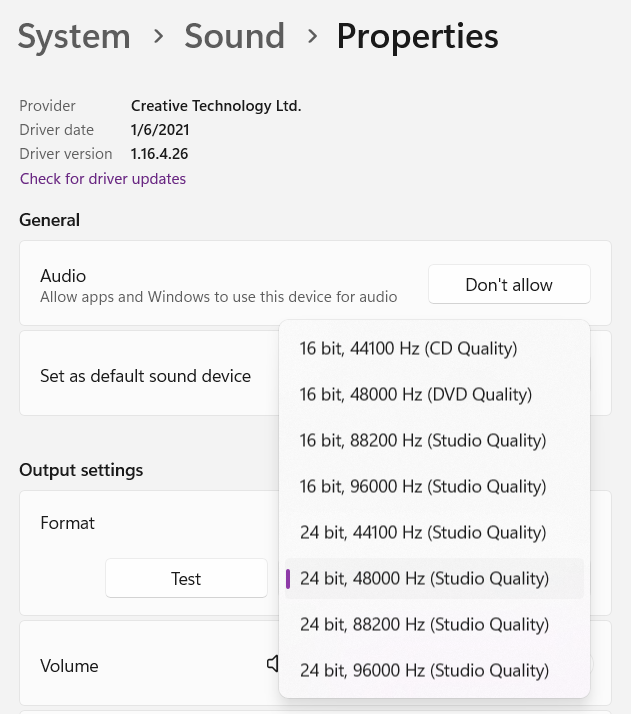
This setting allows you to adjust the quality of audio output. For example, if you’re playing high-resolution (hi-res) audio, you can configure the output format to match hi-res quality, enabling higher audio fidelity through your speakers or headphones. For custom-built PCs with high-quality DACs, setting this option allows you to enjoy premium sound quality. Here’s how to set it up:
Note
In some applications, selecting a high-quality setting may cause audio issues. If this occurs, try lowering the setting to 24-bit 48000 Hz or below. (CD quality is 16-bit 44100 Hz, while hi-res formats are 24-bit 96000 Hz or 192000 Hz.)
Spatial Sound
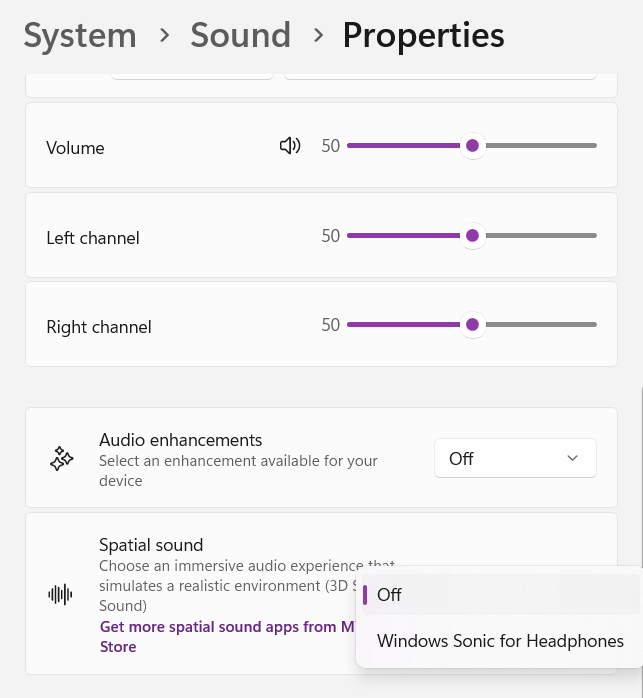
This feature applies an effect that creates a spatial audio experience, giving the impression that sound is coming from multiple directions. While it’s generally fine to keep this setting off, it can be interesting to turn it on for immersive sound in games, movies, or music. Here’s how to enable spatial sound:
You can also toggle this setting easily from the taskbar.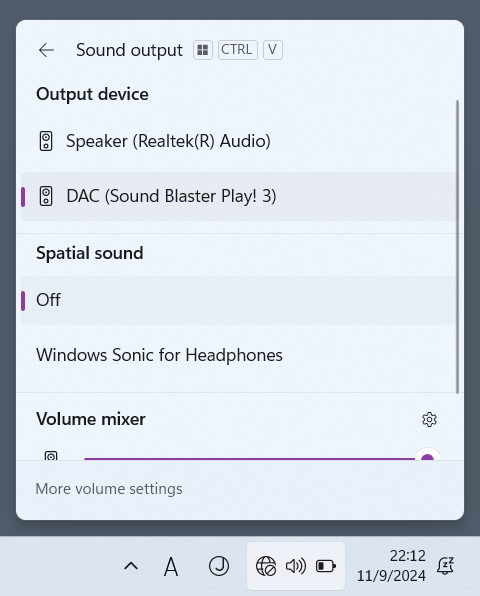
Audio Enhancements (Device Default Effects)
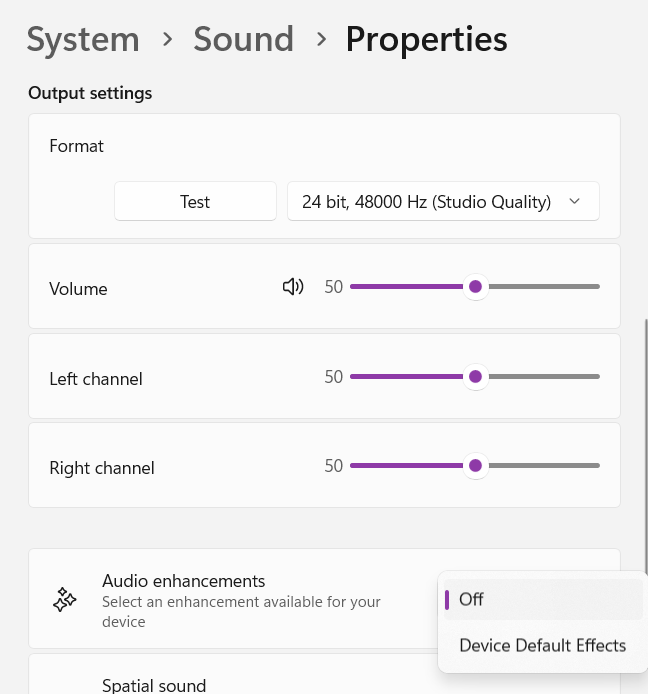
This feature is available on certain devices. For example, if you’re using headphones with a DAC that supports an equalizer or effects, or if your PC has pre-installed software like MaxxAudio, you can use this setting to enable or disable audio enhancements.
In some cases, such as when a connected headset experiences issues due to MaxxAudio or a DAC app, turning off audio enhancements may resolve the problem. Follow these steps to configure it:
Volume Mixer for Adjusting App-Specific Volume
This feature allows you to adjust volume levels for each application in Windows, making it useful for tasks like muting specific apps during a meeting. Here’s how to use the volume mixer:
This completes the guide to configuring sound output settings in Windows 11. For troubleshooting issues beyond these settings, like driver problems, consult your company’s IT department or a tech-savvy individual. For personal use, searching online for advice can also be helpful.
ad

