ad
Overview
This article, intended for business users and IT beginners, continues from our previous discussion on disk encryption. As I write this, it's Black Friday, and many storage products are likely on sale. Portable disks have a risk of being lost, and encrypting them can prevent information leakage if they are misplaced. I recommend encrypting your portable disk for added security. The disk encryption method introduced here offers a high level of security while being user-friendly.
This method allows you to set up your own PC in such a way that a password is not required. However, when connecting the disk to another computer, it will be necessary to unlock it using a password.
For freelancers who use crucial information for work, I suggest the Pro Edition for added protection.
Purpose
Protect the storage you carry around with encryption. It lowers the risk of loss or theft.
Target Audience
Windows offers a disk encryption feature called BitLocker. However, it requires the following conditions:
Necessary Computer Requirements:
Setup Steps:
Preliminary Work
Computer Work
- Open the Control Panel and select "BitLocker Drive Encryption".
- The connected drive will appear under "Removable data drives". It's okay if the PC's drive is not encrypted. Encryption can be performed on the removable disk.

- Click "Turn on BitLocker".
- "Choose how you want to unlock this drive" – Select "Use a password to unlock the drive" and set a password that meets the criteria on the screen. Once entered, proceed to the next step.

- "How do you want to back up your recovery key?" – Choose "Print the recovery key". This is because selecting "Save to a file" does not allow saving the file on the PC.

- A print screen will appear. No printer is needed. Save the file to your PC using Microsoft PDF.
- After saving the PDF, proceed to the next step.
- "Choose how much of your drive to encrypt":
- Proceed to the next step after selecting.
Explanation about this choice:
a. Choosing this will complete the encryption faster. Future data use will still be encrypted.
b. This takes longer to complete the encryption but encrypts even the deleted data areas.
If you started using a new drive with encryption option a, it’s fine to continue using a after reformatting. This is because even deleted encrypted data is hard to recover. - "Choose which encryption mode to use" – Choose "New encryption mode" for more complex and secure encryption.

- Encryption will start.

- After encryption, enable the following setting for easier drive use:
- In the Control Panel, open "BitLocker Drive Encryption".
- Under "Removable data drives" which are encrypted, click "Turn on auto-unlock" to enable it.

- This allows the drive to be mounted without unlocking on the PC where the encryption was performed. However, a password is required when connecting to another PC.
- The encrypted drive can be accessed on Windows Home Edition by performing a password unlock.
Unlocking the Password Lock
- Drives with BitLocker enabled are indicated with a lock icon.
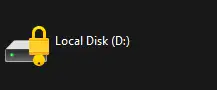
- When you attempt to open such a drive, it will prompt for a password.

- Enter the password you set to mount the drive.
ad